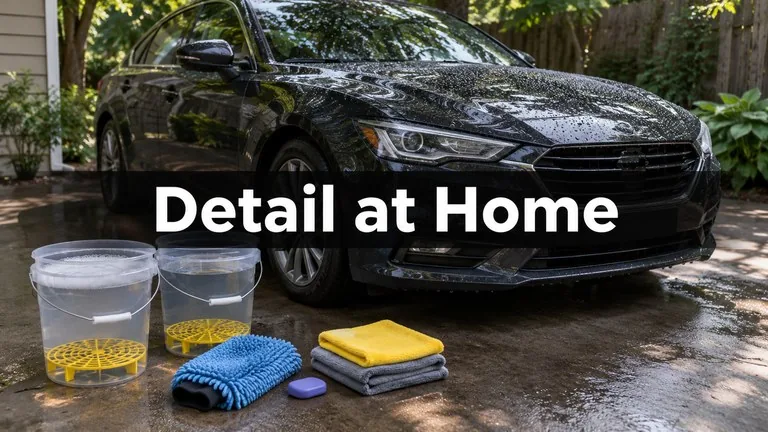
To detail a car at home, clean the interior top to bottom, wash the exterior with the two-bucket method, remove bonded grime with an iron remover and a clay bar, then protect the paint with wax, a sealant or a spray ceramic. A first full detail takes most of a day, roughly 4 to 8 hours depending on the car’s condition. A good starter kit costs around $150 to $250 and lasts for many sessions, while a professional full detail typically runs about $180 to $280 for a sedan and $240 to $400 for an SUV or truck.
The difference between a car wash and a detail is order and thoroughness. Doing the steps in the right sequence keeps you from dragging grit across the paint or undoing work you just finished. This guide covers what to buy, the exact wash method, how to use a clay bar, how wax, sealant and ceramic coatings compare, and when paying a pro makes more sense.
Supplies you need (and what they cost)
You can build a solid kit without buying every specialty product. Prices below are typical retail ranges, and the basics last for many washes.
- Two 5-gallon buckets with grit guards (a plastic grate that sits at the bottom): about $25 to $40 for the set.
- pH-neutral car wash soap: about $10 to $20 a bottle, enough for dozens of washes.
- Microfiber wash mitt or two: about $10 to $20.
- A separate wheel bucket or brush set and a wheel cleaner safe for your wheel finish: about $25 to $45.
- Large microfiber drying towel: about $15 to $30.
- Iron remover spray: about $15 to $25.
- Clay bar or clay mitt kit with lubricant: about $20 to $30.
- Protection: carnauba wax, synthetic sealant or a spray ceramic, each roughly $15 to $40.
- Interior: all-purpose cleaner or interior detailer, upholstery or carpet cleaner, ammonia-free glass cleaner, detailing brushes and a stack of microfiber towels: about $40 to $70 together.
- A shop vacuum with crevice and brush attachments, if you do not already own one.
Skip dish soap. It strips wax and sealant and can dry out rubber trim. Also avoid old bath towels and household paper towels on paint and glass, since they leave lint and can scratch.
Start with the interior
Doing the inside first means dust and debris knocked out of the cabin will land on paint you have not washed yet, not on a finished exterior. Work from the top down so dirt falls onto areas you will clean next.
- Remove floor mats, trash, car seats and loose items. Shake out or hose down rubber mats and set them aside to dry.
- Dust vents, seams and the dashboard with a soft detailing brush while you hold the vacuum nozzle nearby to catch what comes loose.
- Vacuum the headliner lightly, then seats, then carpet. Slide the seats fully forward and back to reach the tracks.
- Clean hard plastics and vinyl with an interior cleaner sprayed onto a towel, not directly onto screens or switches.
- Treat stains in fabric with upholstery cleaner, agitate with a brush and blot with a clean towel. For heavy soil, a small spot extractor helps.
- Clean leather with a dedicated leather cleaner, then apply conditioner.
- Clean glass last with ammonia-free cleaner, which is safer for window tint, using one towel to clean and a second to buff.
Avoid shiny, greasy dressings on the steering wheel, pedals and floor mats. They make surfaces slippery, and a slick pedal or steering wheel is a safety problem.
The two-bucket wash method
Most swirl marks come from washing, when grit picked up by the mitt gets rubbed back into the paint. The two-bucket method keeps that grit out of your clean soap. Fill one bucket with soapy water and the other with plain rinse water, both with grit guards at the bottom. Wash in the shade, on a cool surface, so soap does not dry into spots.
- Clean the wheels and tires first with their own brushes and bucket, since they carry the heaviest brake dust and road grime. Rinse them well.
- Rinse the whole car from top to bottom to knock off loose dirt.
- Load the mitt from the soap bucket and wash one panel at a time, starting at the roof, in straight lines rather than circles.
- Before reloading with soap, dunk and scrub the mitt against the grit guard in the rinse bucket.
- Work down the car, saving the lower doors and bumpers, the dirtiest areas, for last.
- Rinse thoroughly, then dry right away with a large microfiber towel, patting or dragging it gently, or use a leaf blower to push water out of mirrors and trim.
Some cities restrict wash water from running into storm drains. Washing on the lawn, using a biodegradable soap or using a rinseless wash product can keep you within local rules.
Decontaminate with iron remover and clay
Run your fingertips over clean paint inside a thin plastic sandwich bag. If it feels gritty, the paint has bonded contaminants such as rail dust, brake dust and tree sap that washing will not remove. Those particles keep wax from bonding and make the paint look dull.
Spray iron remover on the paint and wheels first. It reacts with embedded iron particles, often turning purple, and rinses off after a few minutes. Then clay the paint: spray a generous amount of clay lubricant on a small section, glide the clay bar with light pressure in straight lines until it moves smoothly, then wipe the section dry. Fold the clay to a clean face often. If you drop the clay bar on the ground, throw it away, because it will pick up grit that scratches.
Clay once or twice a year on most daily drivers. Doing it every wash is unnecessary and adds wear.
If the paint still shows swirls or haze after claying, that is a paint correction job: a dual-action polisher with polish removes a very thin layer of clear coat to level the scratches. Beginners can get good results with a dual-action machine, but practice on a hidden panel first, and keep the pad moving and flat.
Wax vs sealant vs ceramic coating
All three put a protective layer over the clear coat. The main differences are how long they last and how much prep and effort they need.
| Protection | Typical durability | Application | Typical cost |
|---|---|---|---|
| Carnauba wax | About 1 to 3 months | Easy by hand; cures in about an hour | About $15 to $40 per container, many applications |
| Synthetic paint sealant | About 4 to 6 months | Moderate; needs a perfectly clean surface and 12 to 24 hours to cure | About $20 to $40 |
| Spray ceramic (consumer) | About 6 to 12 months | Spray on and wipe off; keep dry for 24 hours or more | About $15 to $35 |
| Professional ceramic coating | About 2 to 10 or more years, depending on product and care | Technical; usually follows paint correction; removal requires polishing | About $500 to $1,500 or more for a sedan; more for SUVs |
For most people, a spray ceramic or a sealant is the practical middle ground: longer protection than wax with little extra effort. Carnauba gives a warm gloss that some owners prefer, but it needs reapplying often. Do not layer a sealant over wax, since a sealant needs bare, clean paint to bond.
DIY vs professional detailing: the cost math
A home detail mostly costs time once you own the kit. A professional detail costs more per visit but gets you tools like hot water extractors, steam cleaners and machine polishers, along with experience you would otherwise have to build.
Example: Lena has an SUV and was paying about $320 for a full professional detail twice a year, or $640. She spends $220 on a home kit in the first year and about $60 a year on refills after that. Her first-year savings are about $420, and about $580 a year from then on, as long as she is willing to give up two Saturdays a year.
Example: Marcus is selling a sedan with stained seats, pet hair and light swirls. A home detail would take him a full weekend and still leave the swirls. He pays about $250 for a full detail plus about $350 for a one-step paint correction, then lists the car with photos that look like a dealer’s. When a car is heading for sale, or the interior needs extraction, a pro often makes sense.
A sensible routine for a daily driver: wash every one to two weeks, vacuum and wipe the interior every few weeks, add a spray sealant or wax top-up every one to three months, and do a full detail with clay and fresh protection in spring and fall.
Common questions
How long does it take to detail a car at home?
A first full detail with interior cleaning, a two-bucket wash, clay and protection usually takes about 4 to 8 hours. Later sessions on a well-kept car go faster, often 2 to 4 hours, because there is less buildup to remove.
How often should you clay bar a car?
Once or twice a year is enough for most daily drivers. Use the plastic bag test after washing: if the paint feels gritty, it is time. Always wax, seal or coat afterward, because claying removes the old protection.
Can I use dish soap to wash my car?
It is best to avoid it. Dish soap is made to cut grease, so it strips wax and sealant from paint and can dry out rubber and plastic trim. A pH-neutral car wash soap cleans well without removing protection.
Is DIY ceramic coating worth it?
Spray ceramics are an easy upgrade over wax and typically last about 6 to 12 months. True ceramic coatings last longer but require careful paint prep and fast, precise application, and mistakes need polishing to fix. If your paint has swirls, a pro coating that includes correction usually gives a better result.
Should I clean the inside or outside of the car first?
Do the interior first. Dust and debris knocked out of the cabin will land on the exterior, which you will wash next. Within the exterior, clean wheels and tires before the paint.
Before you start
- Pick a cool, shaded spot and a day with no rain in the forecast if you plan to apply sealant or ceramic.
- Gather two buckets with grit guards, plenty of clean microfiber towels and a pH-neutral soap.
- Read the label of each product, especially cure times.
- Test any new cleaner on a hidden spot of upholstery or trim.
- Plan the order: interior, wheels, wash, decontaminate, polish if needed, protect.
Editorial note: This article is general information. Product durability and service prices were checked as of November 2026 and vary by product, climate and region; follow each product’s label directions and get local quotes before booking professional work.