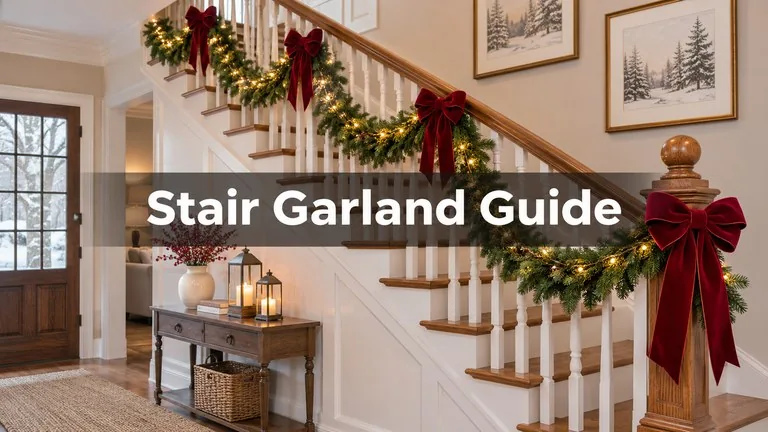
To figure out how much staircase garland you need, measure the handrail along its slope, then multiply: about 1 times that length for garland laid straight along the rail, 1.5 times for loose swags, and about 2 times for garland wrapped in a spiral. A typical straight staircase with 13 or 14 steps has a handrail about 14 feet long, so plan on 14 feet for a straight run, roughly 21 feet for swags and 28 feet for a wrap.
Attach it with zip ties, velvet ribbon or twist ties padded with felt, not nails or staples, and keep the top of the handrail clear enough to grip. That last point matters more than the look. Nearly half of holiday decorating injuries involve falls, according to the Consumer Product Safety Commission, and stairs are where a slippery, bulky garland turns into a hazard. Below are styles, the exact measuring steps, damage-free attachment and how to handle kids, pets and cords.
Staircase garland styles
Straight along the rail is the simplest. The garland rides on the outside face of the handrail or along the tops of the balusters, attached every 12 to 18 inches. It uses the least garland and leaves the grip surface free if you mount it on the side facing away from the stairs.
Swags hang in loose curves between attachment points, usually every 3 to 5 balusters or between the newel post and a midpoint. It looks fuller and more formal. Each swag should dip about 8 to 12 inches; deeper dips look droopy and catch on legs.
Spiral wrap twists the garland around the handrail itself. It looks dramatic but covers the grip surface, so only do this on a staircase that has a second handrail on the wall side, or wrap loosely with wide gaps where hands go.
Accents at the newel post (the large post at the bottom) finish any style: a bow, a cluster of ornaments, or a small wreath hung on the post. This is also the best place to hide a battery pack or plug.
How to measure for staircase garland
- Run a flexible tape measure along the top of the handrail from the bottom newel post to the top post. Measure the slope, not the floor distance.
- Add any landing rails or balcony rails you want to cover, measured separately.
- Decide how far the garland should drape over the bottom newel post. Add that length, usually 12 to 24 inches.
- Multiply the total by 1 for straight, 1.5 for swags or 2 for a spiral wrap.
- Round up to whole garland lengths. Garland is usually sold in 6-foot and 9-foot pieces, and in longer 25-foot or 50-foot rolls that are cheaper per foot.
- For a fuller look, plan to layer two thinner garlands rather than buy one bulky one that is hard to attach.
| Handrail length | Straight run | Swags (x 1.5) | Spiral wrap (x 2) |
|---|---|---|---|
| 8 ft (short flight or half stair) | 9 ft | 12 to 15 ft | 16 to 18 ft |
| 12 ft | 12 to 15 ft | 18 ft | 24 to 27 ft |
| 14 ft (typical full flight) | 15 to 18 ft | 21 to 24 ft | 28 to 30 ft |
| 18 ft (tall ceilings or long run) | 18 to 21 ft | 27 ft | 36 ft |
Example: Olivia’s staircase has 14 risers at about 7.5 inches and 13 treads at about 10 inches. The rise is about 105 inches and the run about 130 inches, so the handrail measures close to 167 inches, or about 14 feet. She wants swags plus an 18-inch drop at the newel post, so she needs (14 + 1.5) × 1.5, about 23 feet. She buys one 25-foot roll of unlit garland and a 9-foot pre-lit garland to layer through the middle section where light shows best from the entry.
Attaching garland without damaging the rail
Most handrails are stained or painted wood, and both scratch and dent easily. Anything that grips tightly needs padding, and anything sticky can pull off the finish.
- Zip ties: the most secure option. Use clear or green ties, loop them around the garland’s wire core and the baluster (not the handrail), and cut the tails short. Slip a small felt pad or a piece of ribbon under each tie where it touches wood.
- Velvet or satin ribbon: ties tight, looks decorative and will not mark a finish. Bows at each swag point double as decoration.
- Twist ties or pipe cleaners: easy to adjust and reuse, best for light garland.
- Clear removable adhesive clips: work on the underside of a smooth painted handrail. Avoid them on stained, oiled or varnished wood, where removing the strip can lift the finish.
- Florist wire: strong but sharp at the cut ends. Bend the ends back into the garland so they do not scratch hands or the rail.
Attach at the balusters, not the handrail, whenever you can. A tie around the handrail sits exactly where hands slide, while a tie around a baluster stays out of the way. At the top and bottom posts, wrap ribbon twice around the post and tie the garland end to it so the weight of the whole run does not hang from the last zip tie.
Pre-lit garland on stairs: battery or plug-in
Battery-powered pre-lit garland is usually the better fit for stairs because no cord has to run along the steps or across the floor at the bottom. Most use three AA or D batteries per garland, and a 6-hours-on timer stretches battery life to a few weeks. Tuck the battery pack into the garland near the newel post behind a bow, where you can reach it without climbing.
Plug-in garland is brighter and never needs batteries, but you need an outlet near the bottom of the stairs. Run the cord down the outside of the newel post and along the baseboard to the outlet with clear cord clips, never across the bottom step or a walkway. Check the tag for how many garlands can connect end to end, and plug in through a timer so it turns off overnight.
Use LED sets. They run cool against the garland and wood and draw only a few watts. For a staircase that goes up from a main entry, warm white LEDs blend with interior lighting better than cool white.
Kid and pet safety on decorated stairs
The International Residential Code requires a handrail on stairs with four or more risers because people need something to grab when they slip. Garland on top of the rail defeats that. Leave the top of at least one handrail clear for its full length, or wrap so loosely that a hand can close around the rail between twists.
- Small children: skip glass ornaments, small bells and decorative picks with berries within reach. Shatterproof ornaments, wired firmly in, are safer from the first few steps.
- Toddlers who climb: do not leave long drops at the bottom that a child can pull on. A tug can bring a whole run of garland and its lights down the stairs.
- Pets: the ASPCA lists tinsel, ribbon and electrical cords among holiday hazards for pets, and real holly and mistletoe can upset a dog’s or cat’s stomach. Use artificial greens and keep cords off the floor near the bottom step.
- Baby gates: keep garland clear of the gate’s mount and latch so it closes fully.
- Lighting: keep a hall or stair light on at night. Garland lights alone rarely light the treads well enough.
Example: Ben and Alisha have a 2-year-old and a cat that chews cords. They put a battery pre-lit garland on the outside of the balusters with felt-padded zip ties, hang swags no lower than the second baluster from the bottom, and skip ornaments below the third step. The battery pack sits at the top of the newel post inside a large bow, out of the toddler’s reach, and no cord touches the floor.
Styling ideas that work
Classic: a full fir garland with red velvet bows at every swag point and a large bow on the newel post. Use one bow every 3 to 5 feet.
Natural: eucalyptus or cedar layered over a plain pine base with pinecones wired in, no bows. This look carries into January once you remove the obvious Christmas pieces.
Lights-forward: a thinner garland with a dense LED string woven through, about 100 lights per 9 feet, and small clear or mercury-glass ornaments clustered near the posts.
Budget: one long roll of plain garland runs much less per foot than several short pieces. Add yard clippings near the posts, where they are easy to swap out as they dry.
Common questions
How much garland do I need for a staircase?
Measure the handrail along its slope. Use about the same length for a straight run, 1.5 times for swags and about 2 times for a spiral wrap, plus 12 to 24 inches for the drape at the newel post. A typical full flight with a 14-foot rail needs about 21 to 24 feet for swags.
How do you attach garland to a banister without damaging it?
Tie it to the balusters with zip ties, ribbon or twist ties, padded with felt where they touch wood. Avoid nails and staples, and avoid adhesive clips on stained or varnished wood, which can lift the finish.
Is battery or plug-in garland better for stairs?
Battery garland is usually better because no cord runs along the steps or across the floor. Plug-in garland is brighter and cheaper to run, but it needs a nearby outlet and careful cord routing along the baseboard.
Is garland on a stair rail a safety hazard?
It can be if it covers the grip surface or has long drops near the floor. Keep the top of at least one handrail clear, attach garland to balusters instead of wrapping the rail tightly, and keep cords off the steps.
Before you hang the garland
- Measure the handrail along the slope and multiply by your chosen style.
- Buy long rolls rather than many short pieces when the run is over 12 feet.
- Gather felt-padded zip ties, ribbon or twist ties, and skip nails and staples.
- Choose battery pre-lit garland unless you have an outlet right at the bottom.
- Leave one handrail clear to grip and keep drops off the bottom steps.
- Keep ornaments, berries and cords out of reach of small children and pets.
Editorial note: This article is general information, and guidance was checked as of November 2026. Follow the instructions on your garland and lights, and see the CPSC and the ASPCA for current home and pet safety tips.